
Number plates after bumper or bodywork repairs: a refitting checklist
Record the registration, inspect the plate and mounting area, then complete secure fitting and visibility checks after bumper or paint repairs.
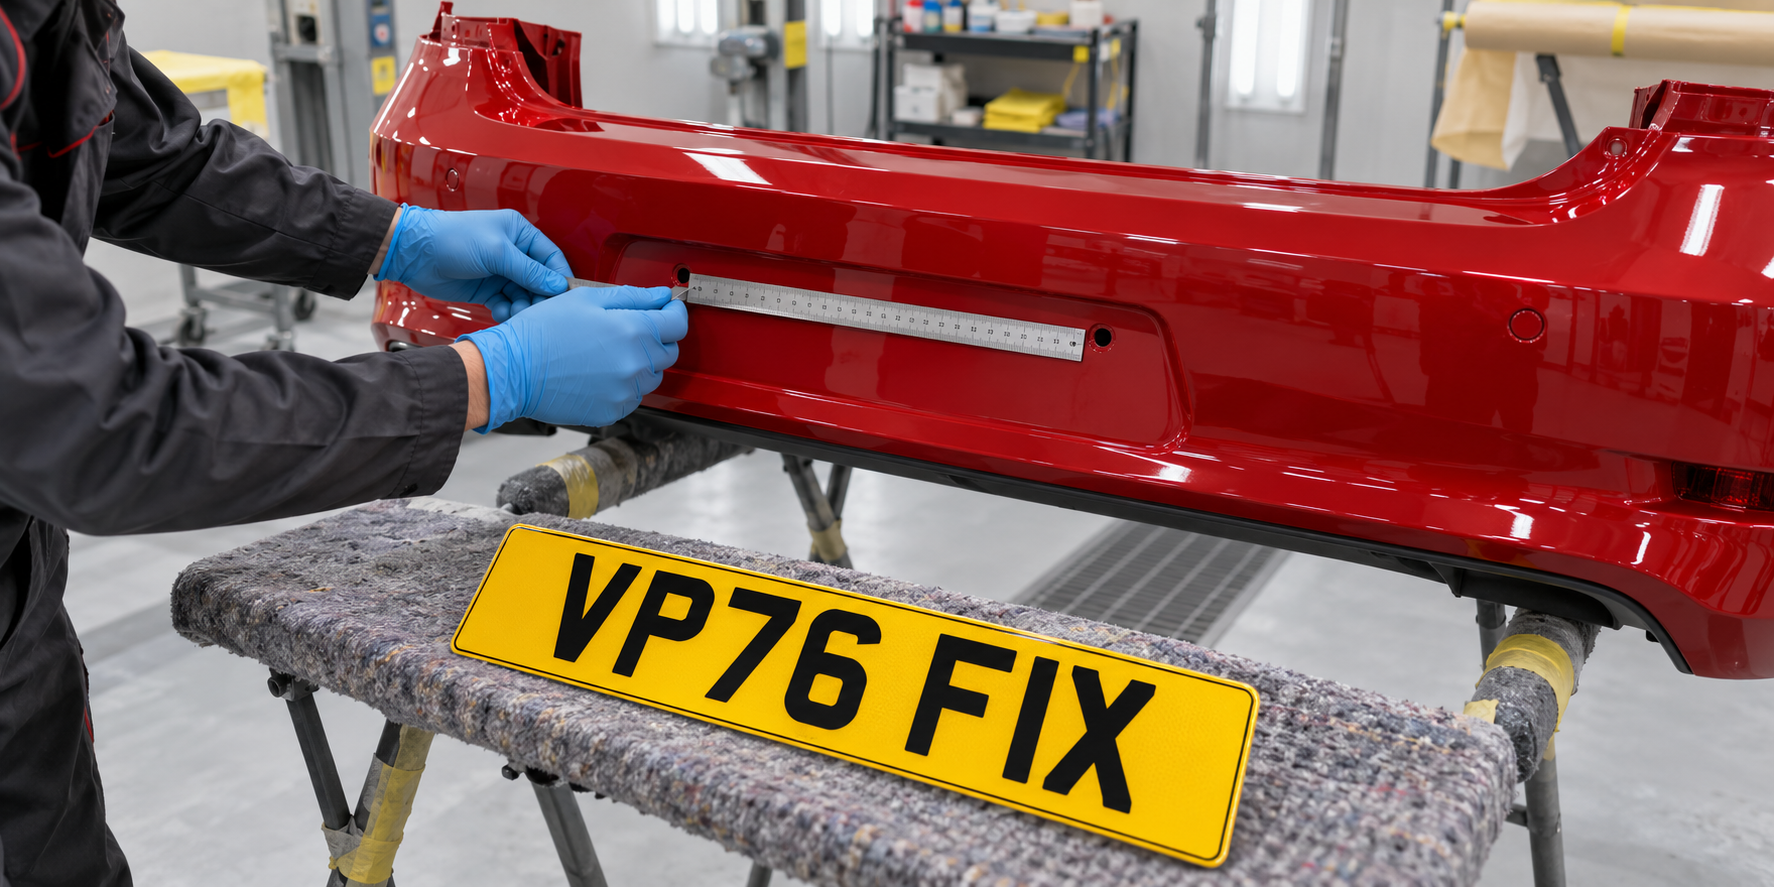
Record the plate and mounting arrangement first
Before repair work begins, photograph the complete front or rear plate and its mounting area straight on. Record the registration, plate dimensions, holder or plinth, screw positions and any nearby lamps, cameras, sensors or trim.
If both plates are removed, label them front and rear and keep them protected from overspray, solvents, heat and workshop damage. The white front and yellow rear plates may share a registration, but their colours and mounting details are different.
- Photograph the complete registration before removal.
- Measure the plate and usable mounting area.
- Record holder, screw and pad positions.
- Note nearby lamps, cameras and sensors.
- Store removed plates flat and protected.
Inspect the old plate before reusing it
Clean the removed plate gently and inspect it in good light. Look for cracks around drilled holes, bent corners, peeling layers, trapped moisture, fading, lifting raised characters and adhesive damage on the reverse.
The current DVSA MOT manual says plates must not be obscured, excessively damaged, deteriorated or delaminated. Refit only a plate that remains secure and clearly readable; paintwork repairs do not restore a damaged reflective surface or failing plate layer.
- Check both sides of the plate.
- Look closely around holes and corners.
- Check raised characters for lifting.
- Do not cover damage with film or trim.
- Replace a plate that is no longer clear or secure.
Prepare the repaired mounting area
Confirm that the replacement bumper, tailgate or repaired panel has the correct flat mounting area and suitable fixing points before attaching the plate. Remove masking material and loose residue, then allow paint and repair products to cure according to the body shop or product instructions.
Do not drill blindly through a repaired panel. Check behind the intended fixing position for wiring, lamps, sensors and other components, and use the vehicle's original mounting points or a suitable holder where available. If the panel shape has changed, measure it again rather than copying the old hole spacing automatically.
Refit the correct plate in a visible position
Compare the registration with the vehicle record before fitting and make sure the same registration is shown at both ends of a car. For a modern vehicle, the front plate uses black characters on white and the rear uses black characters on yellow.
UK display regulations require a plate to be fitted vertically, or as close to vertical as is reasonably practicable, and positioned so the characters are easily distinguishable in normal daylight. Refit it in the intended mounting area without bodywork, trim, a tow point or another attachment crossing the registration.
- Match every character to the vehicle record.
- Use white at the front and yellow at the rear.
- Keep the plate upright and unobstructed.
- Check the complete registration from straight behind or ahead.
Keep fixings away from the registration
Use suitable pads, screws, clips or a holder for the repaired surface and follow their fitting instructions. Do not overtighten a rigid plate against a curved or uneven panel, and keep every fixing away from letters, numbers and required lower markings.
The DVSA manual lists a missing plate, or one insecure enough to be likely to fall off, as a major defect. It also says a feature or fixing must not change the appearance or legibility of a character. After fitting, press or hold the plate gently at each corner to check for movement without flexing it.
- Use suitable fixing points and components.
- Keep screws and caps clear of characters.
- Do not force the plate around a curve.
- Check holders and clips are fully engaged.
- Test for movement after fitting.
Complete the post-repair handover check
Stand back and read the whole registration at both ends. Check that the repaired panel aligns correctly, no masking or polish remains on the plate, and nearby cameras, sensors, handles and moving panels still work without touching it.
Switch on the position lamps and confirm that the rear plate lamp illuminates the rear registration. Recheck the plate after the first journeys and washes for movement, lifting pads or stress around holes. If a replacement is needed, choose Road Legal in the Vista builder for public-road use, select Front, Rear or Pair and prepare the accepted identity and registration-entitlement documents. Official guidance checked on 31 October 2026.
- Read both plates after the repair.
- Check the rear plate lamp.
- Test nearby sensors, cameras and moving panels.
- Reinspect fixings after the first journeys.
- Prepare the required documents for a road-use replacement.